
*Massive disclaimer: This particular Happy Half Moon Top (HHMT) took me nearer an hour to make. But *that* was because I had to stop and take notes and photos! Soooo I'm guessing with no distractions it'll take 30 - 40 minutes. Let me know if you find otherwise.
Ingredients:
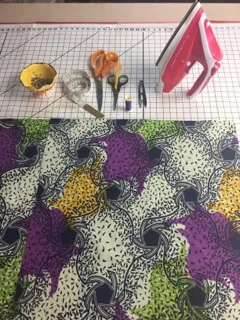
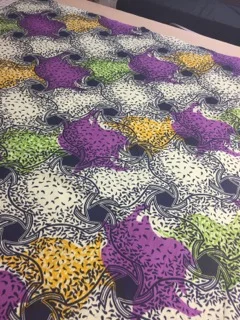
A square of non-stretchy fabric 115 x 115cm to thereabouts. Medium-weight cotton is perfect.
Matching or contrasting (ya rebel!) thread
Fabric scissors
Thread scissors
Sewing machine
Tape measure
Tailors chalk (or a soft pencil if marking on the wrong side of the fabric)
Dressmaking pins or those fancy weights if you have them (thank you GBSB)
Iron/Board (or Towel and floor. Been there)
Somewhere to wear your HHMT afterwards! Basically anywhere!
Photos are arranged in step by step order as accurately as possible.

Steps:
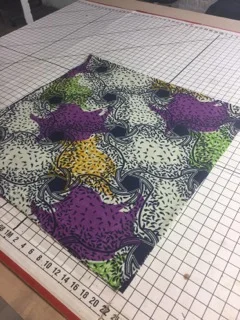
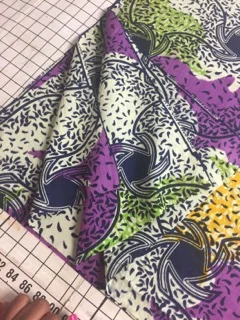
1. Iron your fabric. Fold it in twice so that you end up with a quarter size square.
2. Lay your newly folded square flat with the open corners pointing towards bottom left.
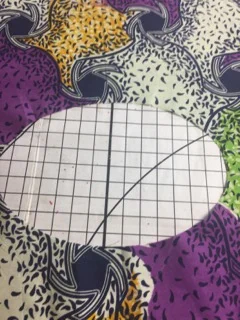
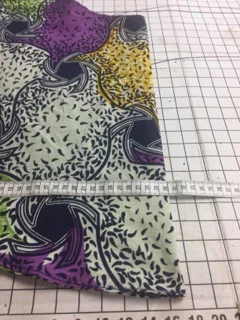
3. To create the arm and lower hem, measure from the top right hand corner to the top left hand corner It should be approximately 57.5cm.
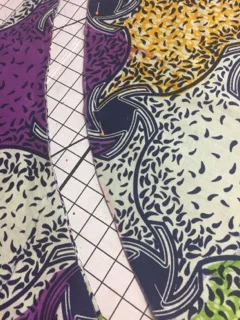
4. Measure the same length from the top right hand corner ALL THE WAY in a curve to the bottom right hand corner. Mark with chalk as you go along.
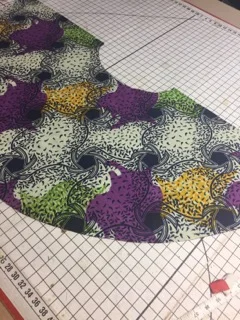
5. Cut along the markings.
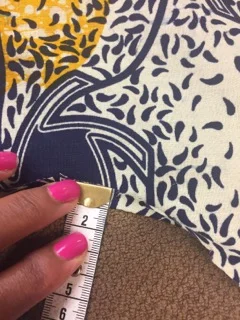
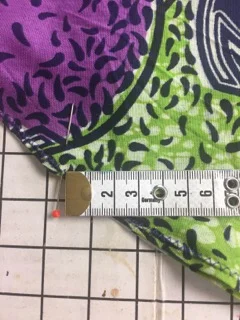
6. At the top right hand corner, measure the neckline. Don't overdo this (as I did at first. Eager) because if you cut it too big you can't make it smaller. Whereas if you cut the neckline small you can always go up in increments. This top has a loose off the shoulder style. I measured 14cm from the corner towards the sleeve and 7 cm from corner towards the hem. This produced a neckline that falls slightly off the shoulder when neatened (or reveals a bra strap) so I suggest starting at 10cm vs 6cm and opening it up after you cut the neckline to try on and check.
You will be neatening the neckline by 1cm all the way round to prevent the fabric fraying and weakening. If you prefer a modest neckline just make sure it fits snuggly over your head. You should be fine.
Top tip: make a small snip (0.5cm) in the centre of the neckline before you open your fabric so that when you refold you can match the snips up for an even fold.
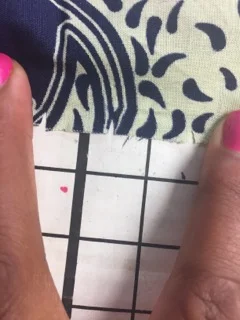
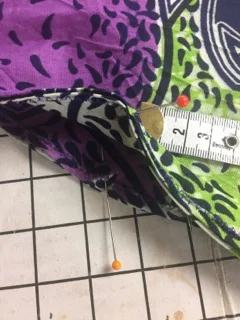
7. At the neckline make small 0.5cm snips at 2/3cm intervals all the way around the circumference. This will help it to lay flat once you've sewn the edge.
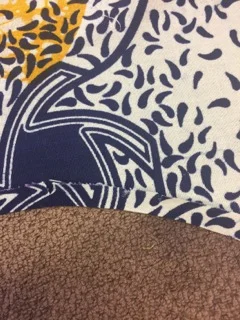
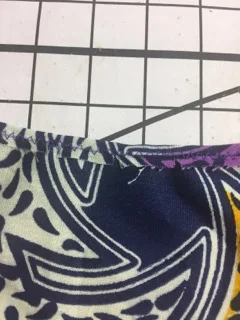
8. On the neckline turn the fabric to the wrong side 1cm width all the way round.
9. Pin with the pins facing at right angles to the edge. Right angle placing makes it easier to iron between the spaces AND remove the pins as you sew. WINNING.
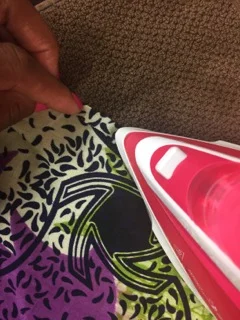
10. Iron the fabric stretching gently with your fingers as you do so (this is where the little snips come into play - wonderful trick!). I suggest that you still keep the pins in until you start your machine sewing as that will help stop the fabric moving around as you sew. Unless you're confident sewist, in which case, you GO Glen Coco! (Mean Girls film fans only)
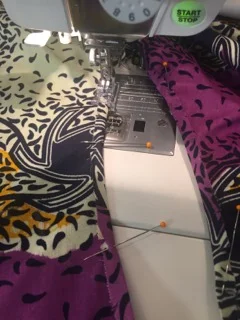
11. Set your machine to a medium zig-zag stitch and sew around the neckline. Use your fingers to gently stretch the curve as you sew. If you left the pins in take them out as you go. Some sewing heathens like to sew over them and take them out afterwards for speed. My heart can't take the anxiety around possible broken sewing machine needles to be honest. I'm not about that risky life.

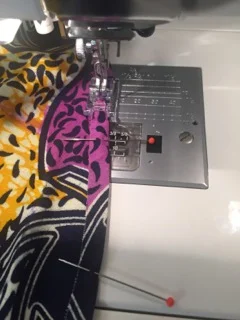

12. Repeat steps 8 - 11. No need to stretch this as you iron or sew though. But do use your fingers to ensure the curved hem stays flat.
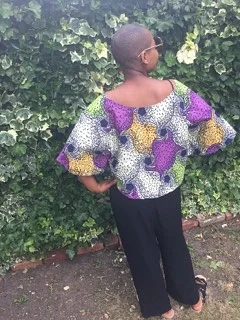
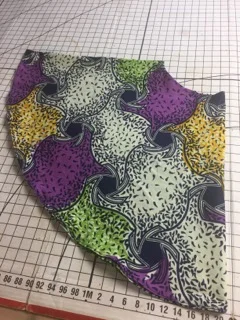
13. A little bit of experimenting now. Try your ALMOST FINISHED HHMT on and check the fit. (Look how prrreeetttyyyy!)
14. Pin on either side of your waist above your hips where you feel comfortable. You need to be able to take you top off without a struggle so check this a couple of times with the pins in (careful now).
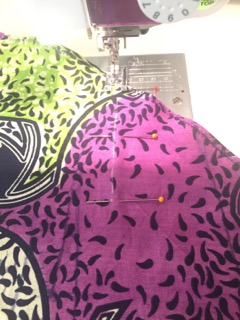
15. Take your HHMT off and lay it flat. Bring the sleeve edges together so its folded in quarter (as you did with the pre-cut fabric at the beginning) Adjust the markings/pins so that they're even. You can use a tape measure for this.
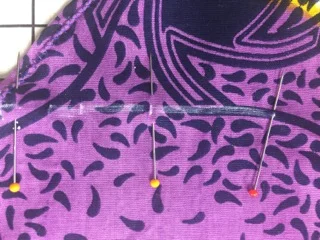
16. Using tailors chalk, mark 10/12 cm from HHM hem upwards towards the shoulder on one side. Pin in place. Repeat on the other side.
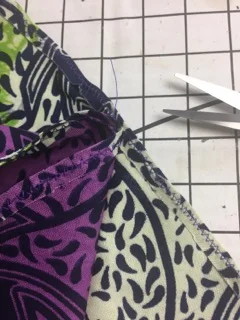
17. Sew over markings in a straight line. Don't forget to reinforce the beginning an end of your stitching.
18. Snip ends, put your handmade beauty on and WERK that sucker to death!

That's it!
Try it! Make it! Wear it! Let me know how you get on and tag #reddskinuk in any social media photos! I would LOVE your feedback!
Thanks a billion to my willing model (and subsequent lucky recipient of this Happy Half Moon Top) and eldest daughter Kareem who pranced around the garden before shooting off to have fun elsewhere.
If you are interested in learning to sew or enhancing your skills and you're SE London based you can book a lesson for you or with a friend. Learning is FUN!